
Let's face it: many practitioners have a love-hate relationship with meal plans. Creating custom meal plans takes time and energy that many practitioners just can't afford. But the undeniable truth is that meal plans can empower your client to achieve their health goals and embrace better eating habits.
Here's the game-changer: You can help your clients understand the benefits of meal planning without having to craft customized plans yourself. It is easy to teach your clients this vital skill if you know how. If you're eager to provide your clients with this powerful tool for success, we have the ideal solution for you: meal planning guides.
What is a Meal Planning Guide?
Meal planning guides are designed to empower the client to do their own meal planning. You can use them to attract new clients, increase their success and keep them engaged. Meal planning guides with clients one-on-one, group programs, workshops, and more.
A meal planning guide includes three key components:
- A collection of recipes designed to meet the needs of the client (or group).
- A blank meal plan for your client to fill out.
- Instructions on how to create their own plan using the recipes provided.
How to Create a Meal Planning Guide
It is easy to create a meal planning guide in just a few minutes using That Clean Life.
1. Create a Collection of recipes that meet the client's needs.
When building any type of customized resource for a client, first assess their unique needs. Use That Clean Life's Assessment Tool to ask your clients the right questions about their lifestyle, food preferences, goals, and more. This assessment tool will help you choose recipes that are just right for that client.
Next, use That Clean Life to put together a Collection of 16 to 20 recipes. You should include four to five breakfasts, lunches, dinners, and snacks.
Use filters to find all the right recipes quickly. You can filter by the number of ingredients, time, meal type, or diet. You can also filter recipes based on nutrition info like calories, macronutrients, and micronutrients.
Tip: See a full list of available filtering options available within That Clean Life.
2. Create a new blank plan and set your Smart plan rules.
Now head to the Planner, create a new blank plan and set any Smart plan rules that apply to your client. For example, if your client is gluten-free and dairy-free, add those as Smart plan rules so that if they swap a recipe, they will only see gluten-free and dairy-free options.
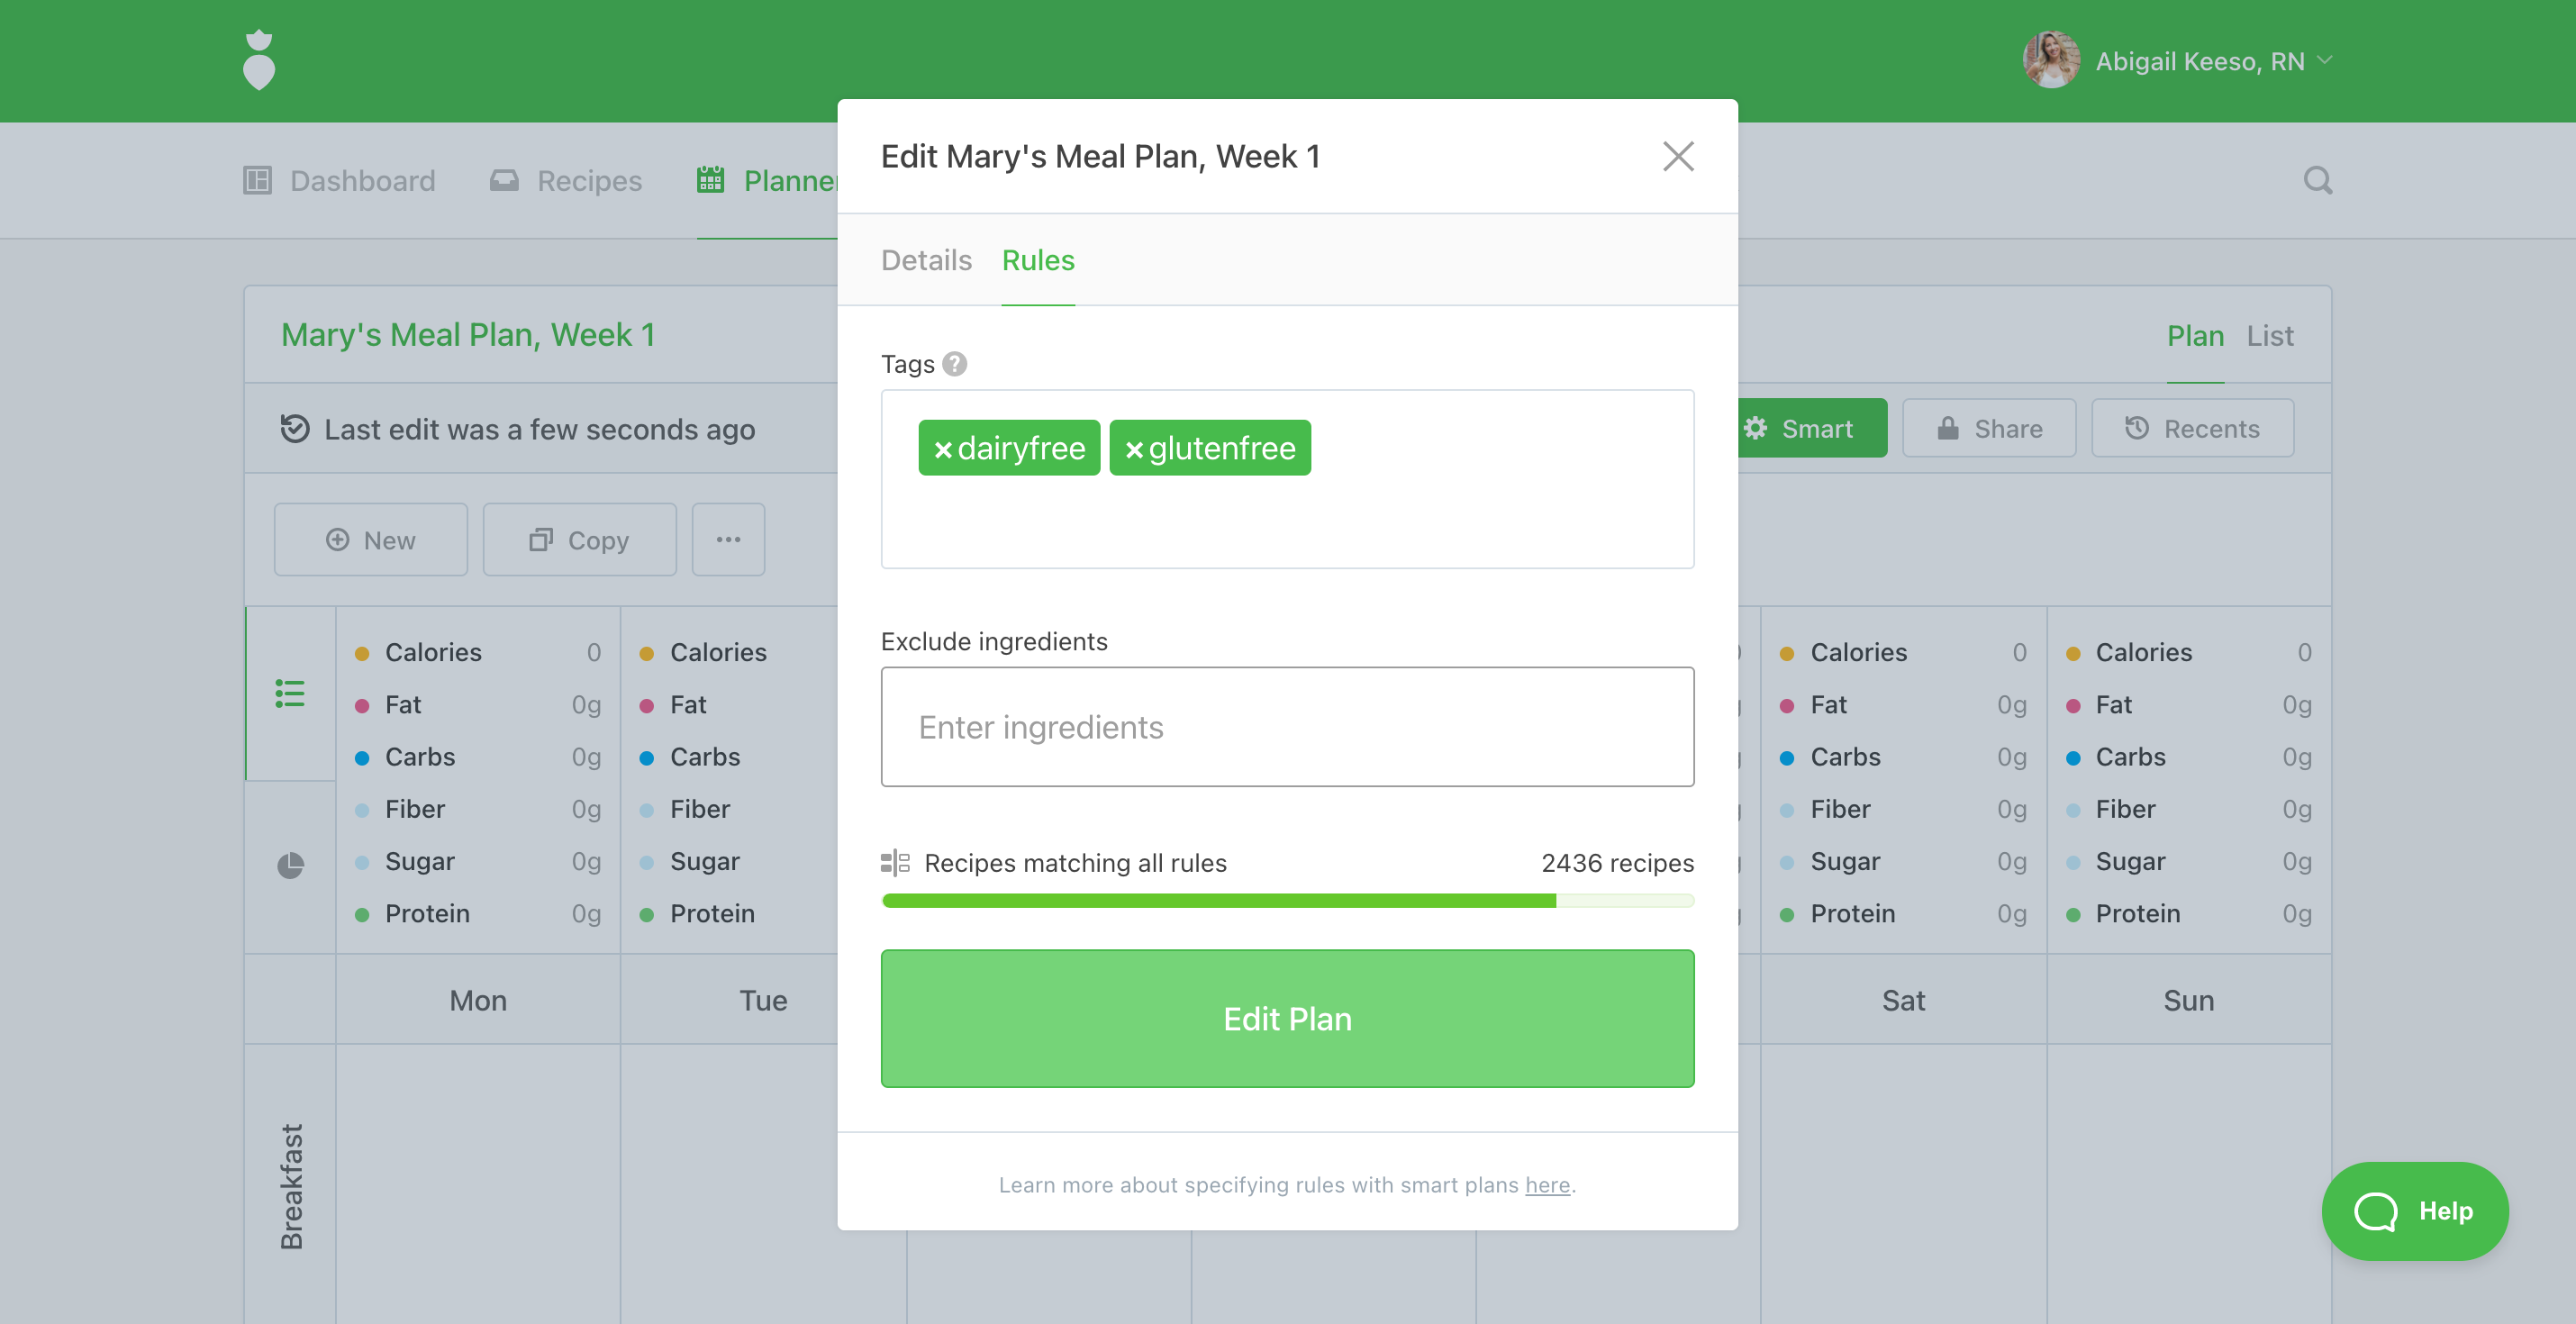
Next, add this blank plan with Smart plan rules to the Collection. Now the Collection will contain a blank plan with recipes.
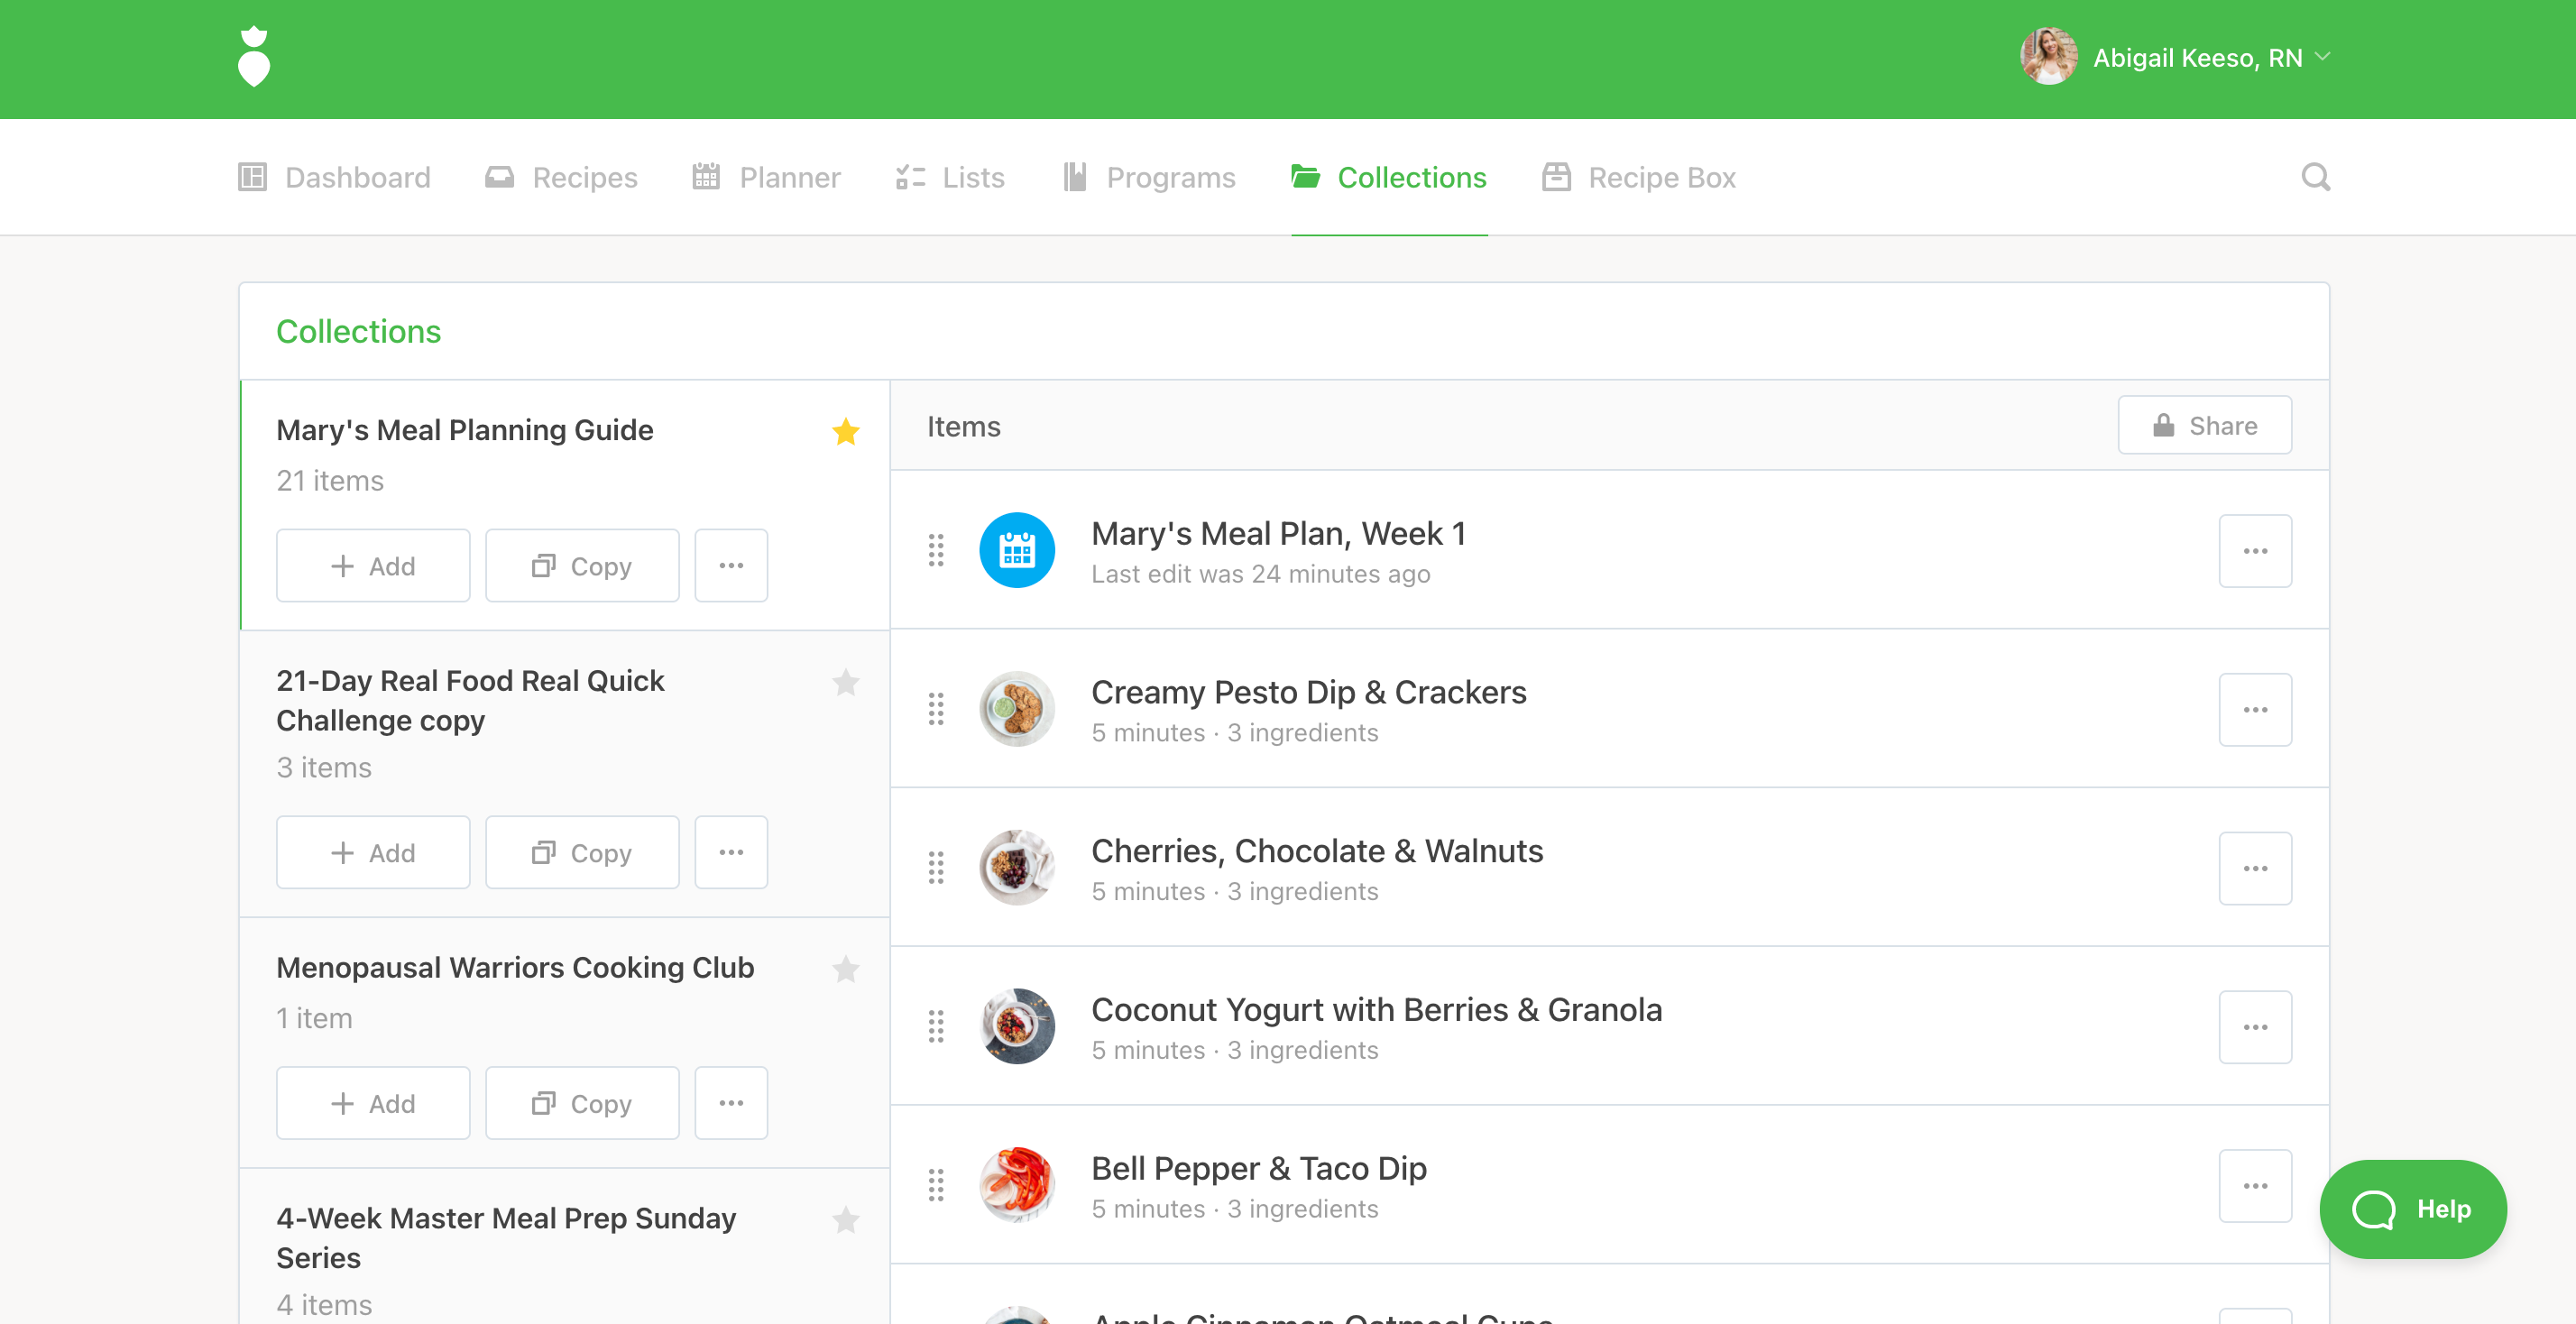
3. Share the Collection of recipes with the blank meal planning template.
Once your Collection contains the hand-picked recipes and blank plan, click "Share". Turn sharing and "Allow Edits" on then choose any other share settings you'd like. Copy the link to share it with your client.
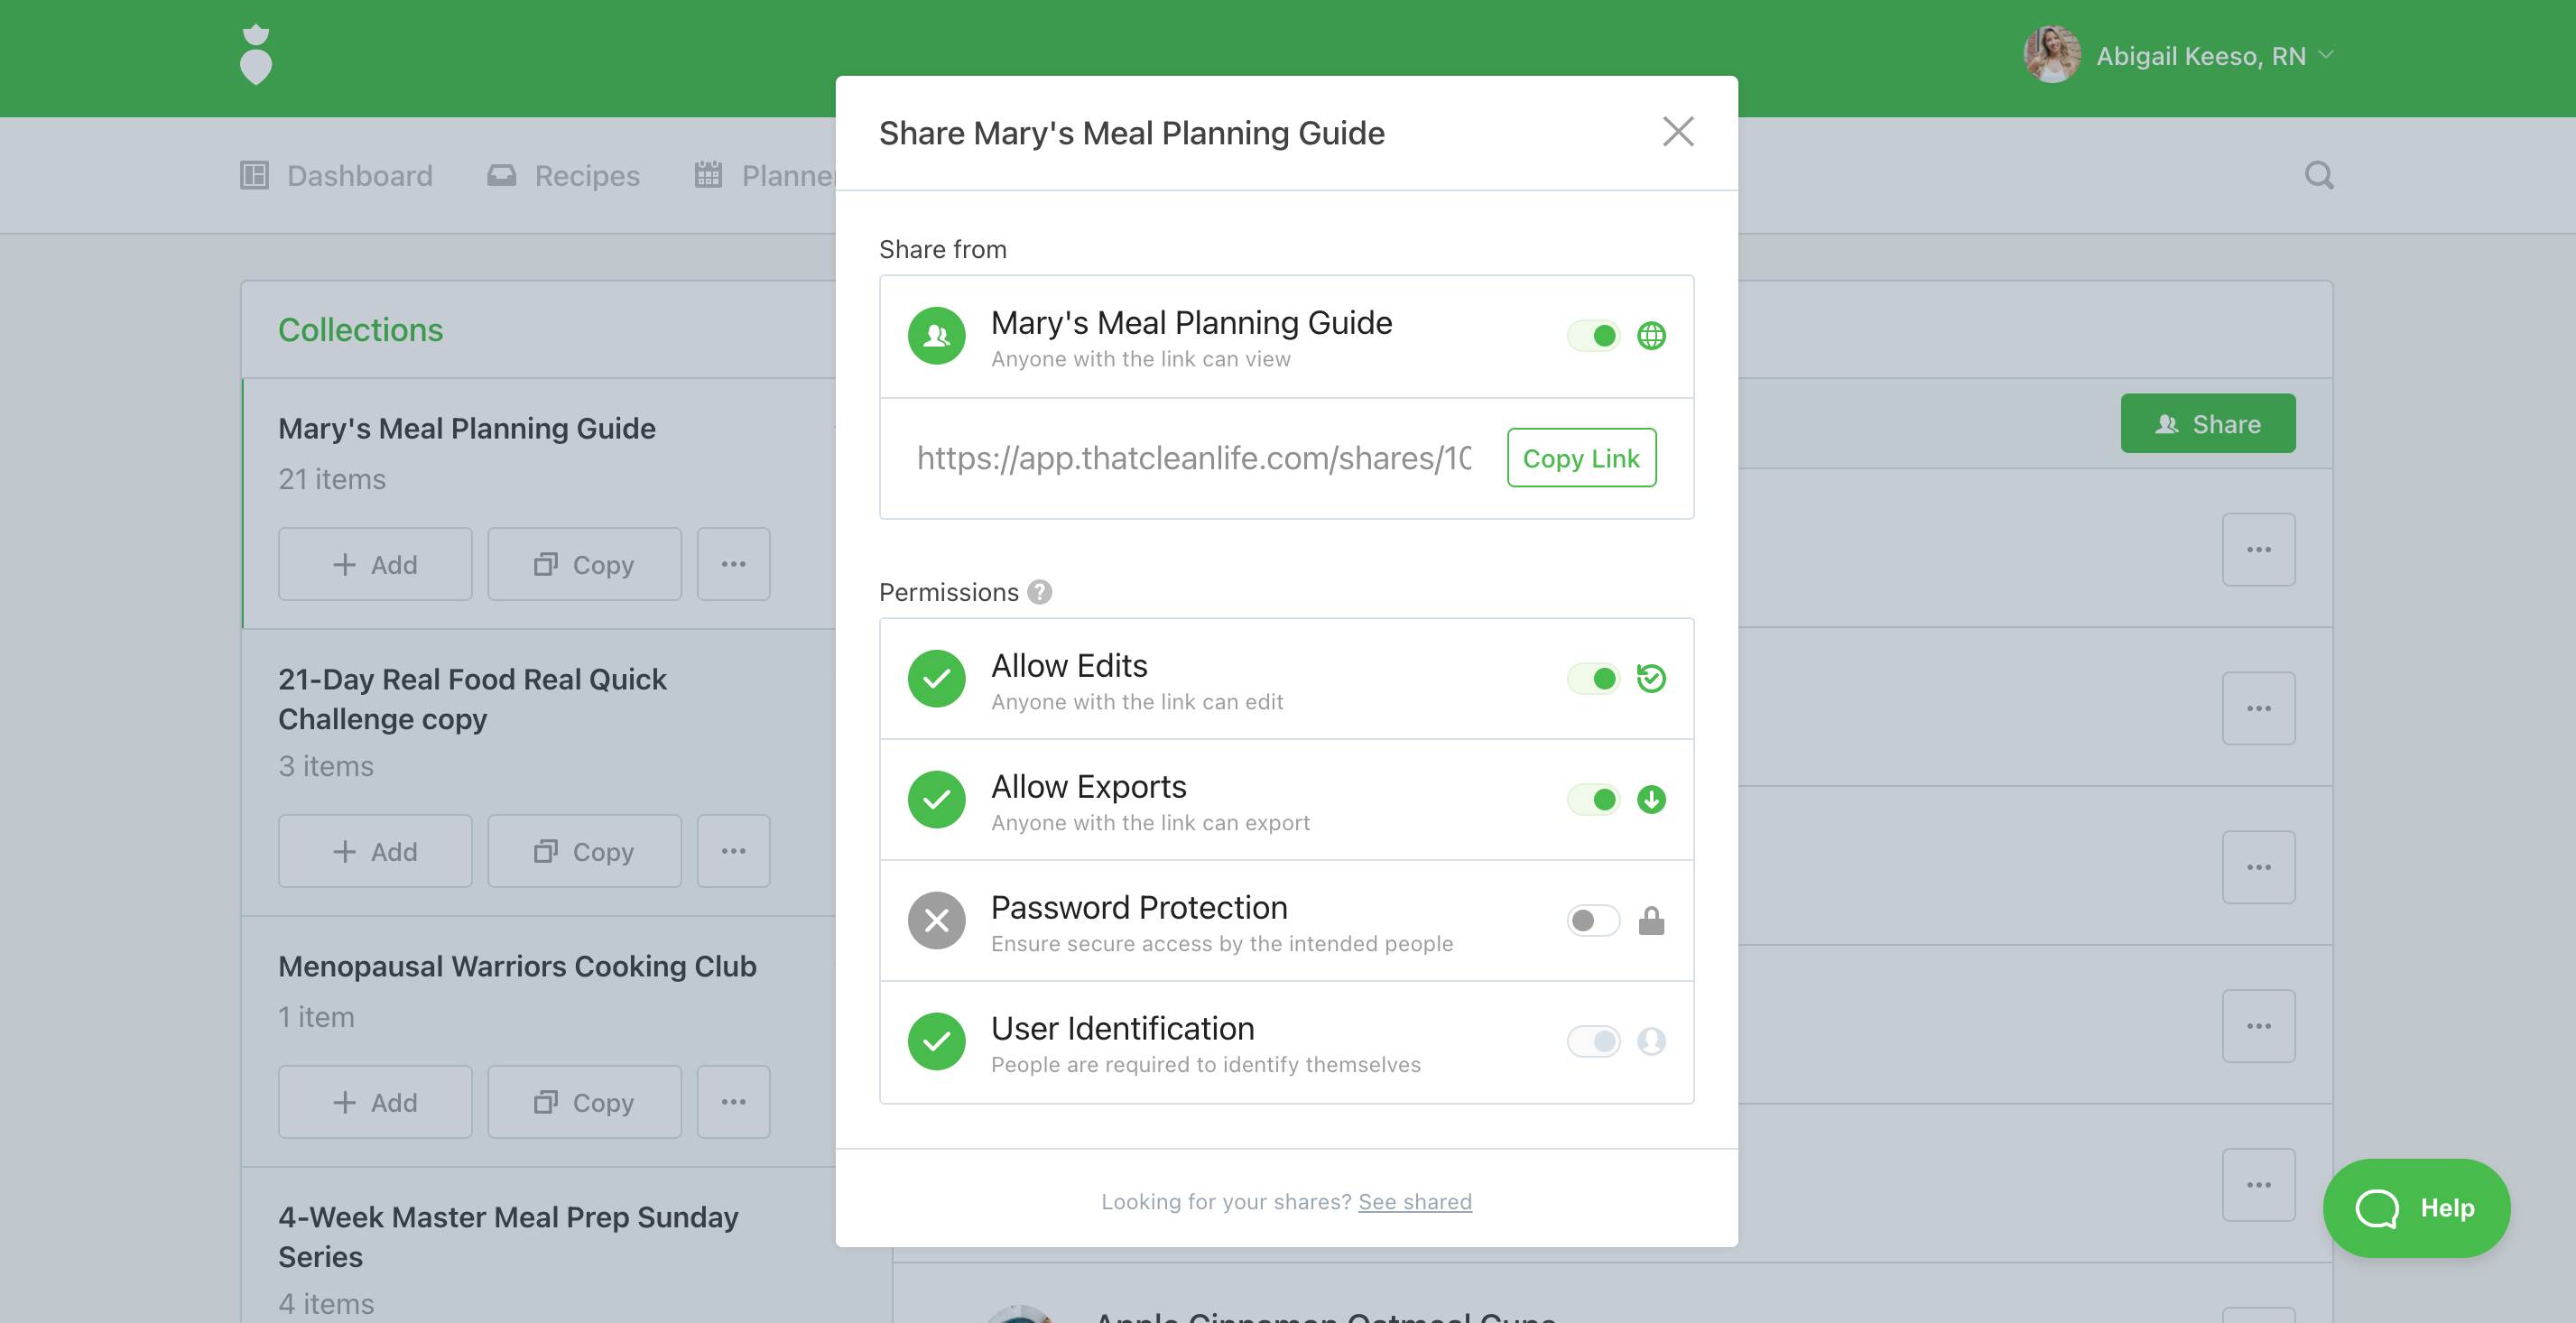
When your client clicks on this link, they'll see the blank plan and recipes you provided.
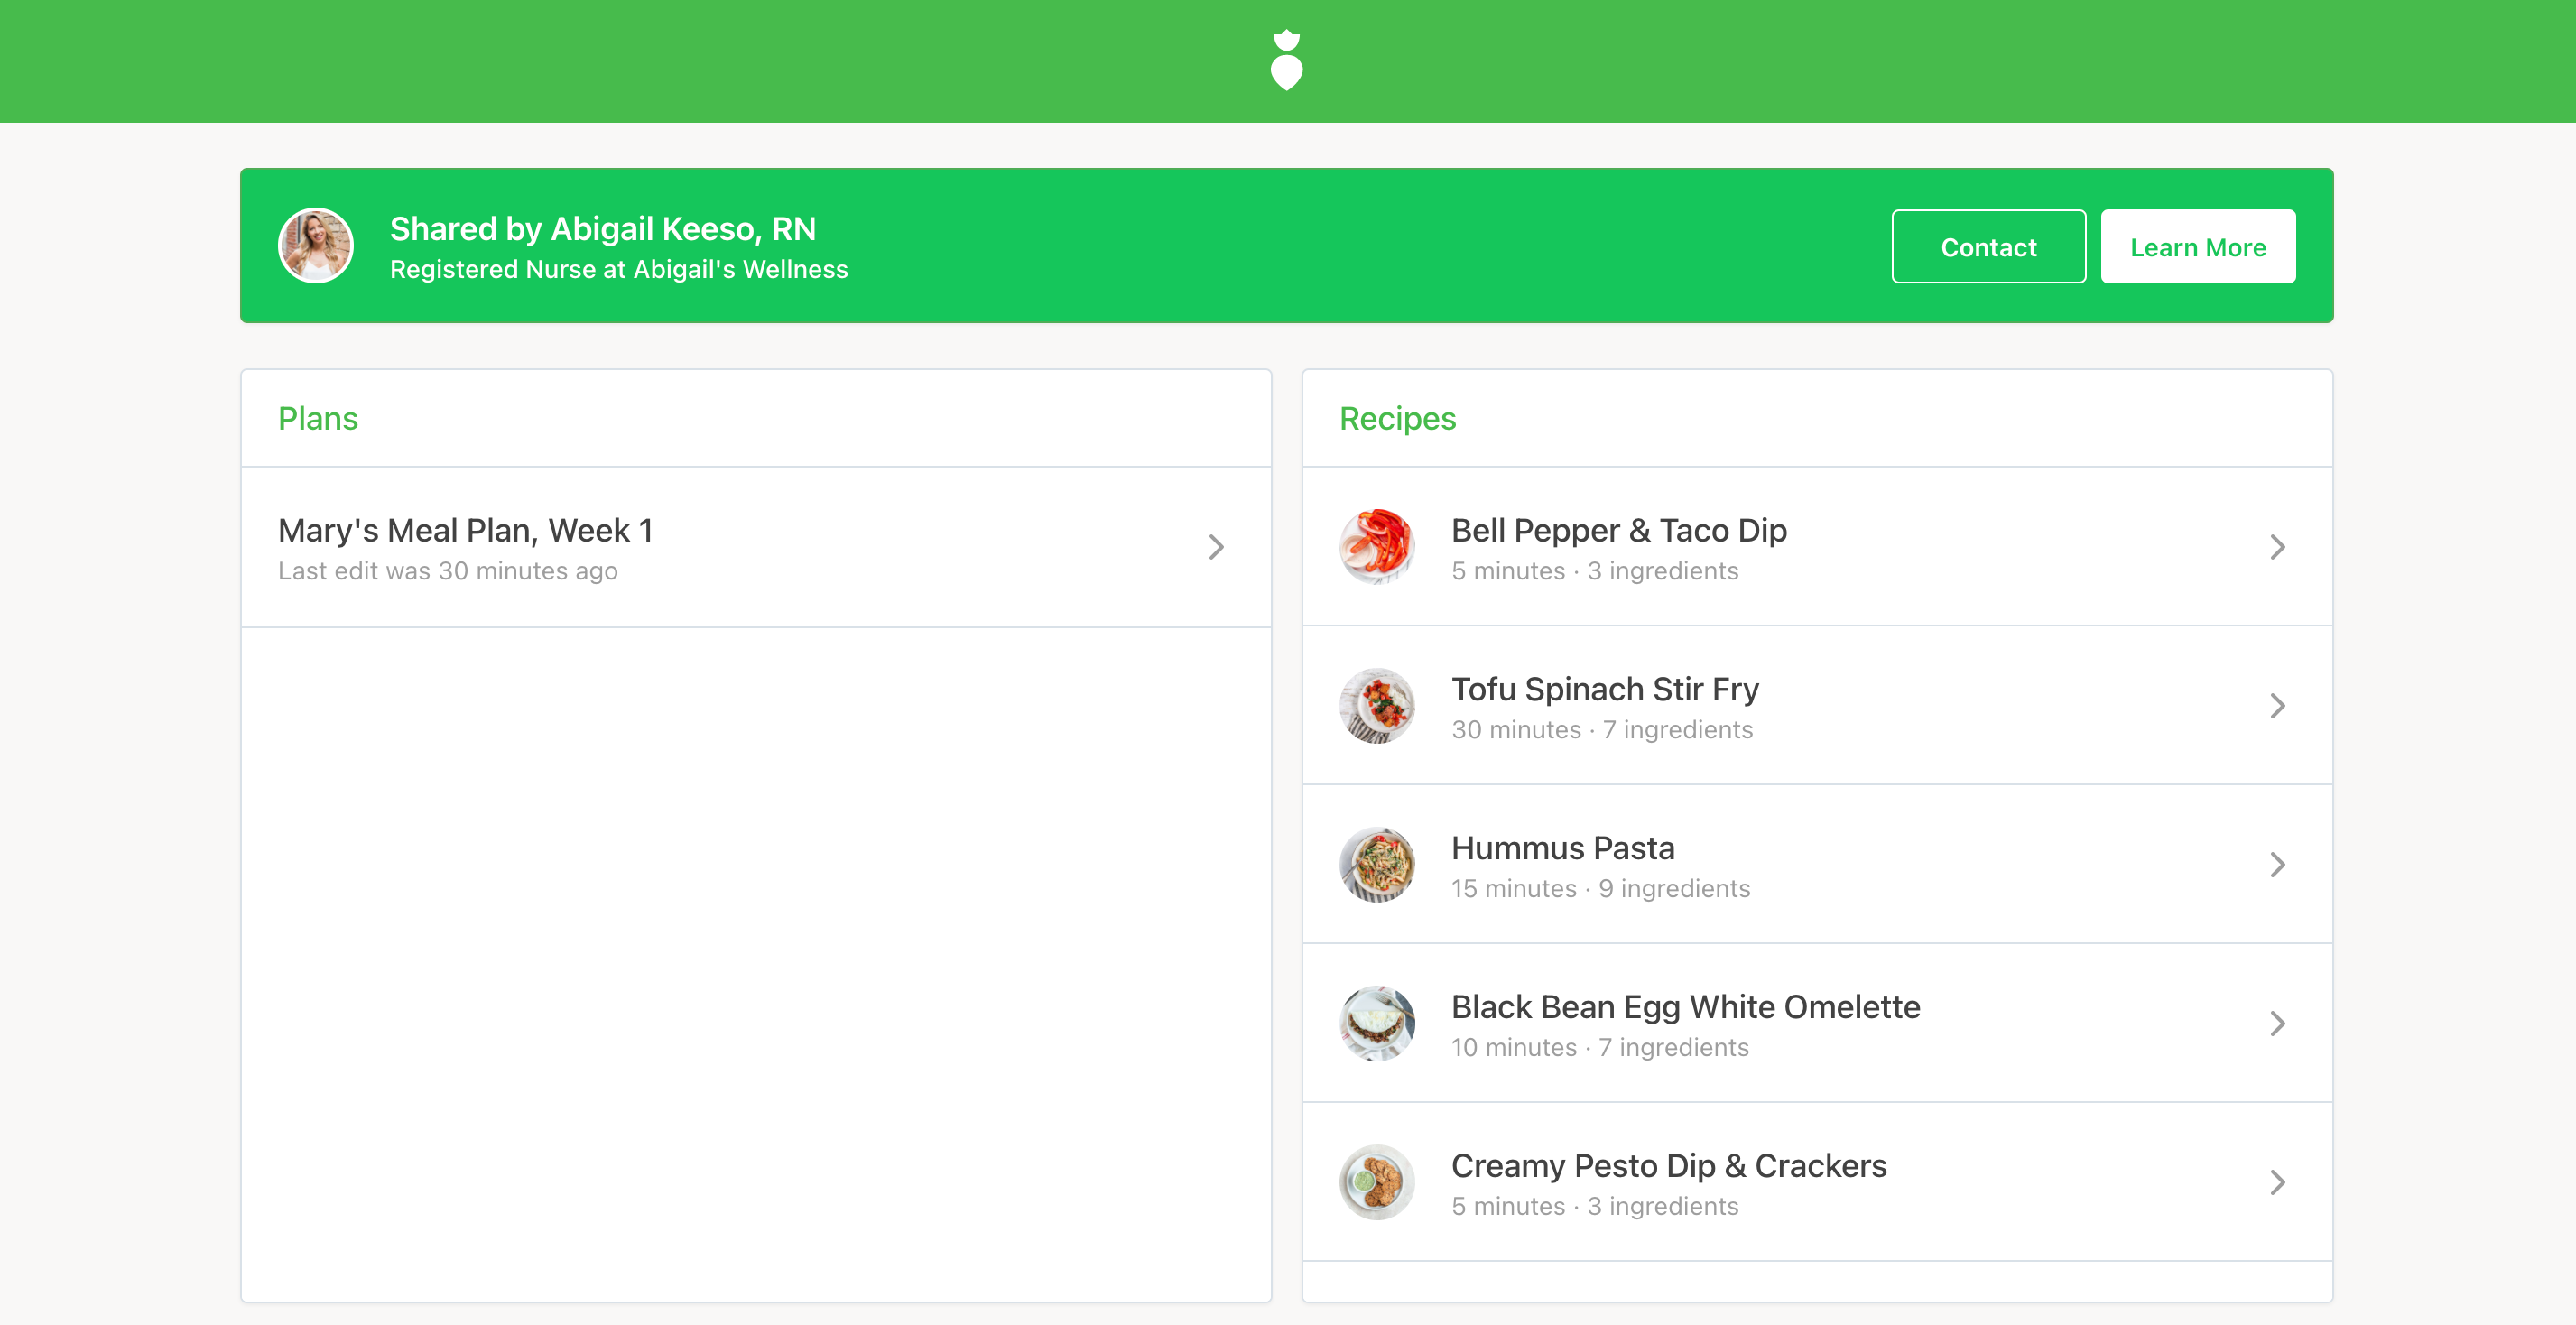
When they click on the plan, they can start to build it out with the recipes you provided them with.
Tip: If you're sharing a Collection with a group of people, be sure to create a deep copy of the original collection and provide each client with their own unique link.
How to Introduce Your Client to Their Meal Planning Guide
Give your client clear instructions on how to use their meal planning guide. These instructions can be sent via email or through your practice management software (like Practice Better).
Here's an example of how you might introduce your client to their meal planning guide:
Hi [Name]
Welcome to your meal planning guide! Taking the time to plan your meals can have such a positive impact on your overall health.
In this meal planning guide, you will find a collection of recipes that I have hand-picked for you, along with a blank planner, where you can plan your meals.
How to Use this Meal Planning Guide:
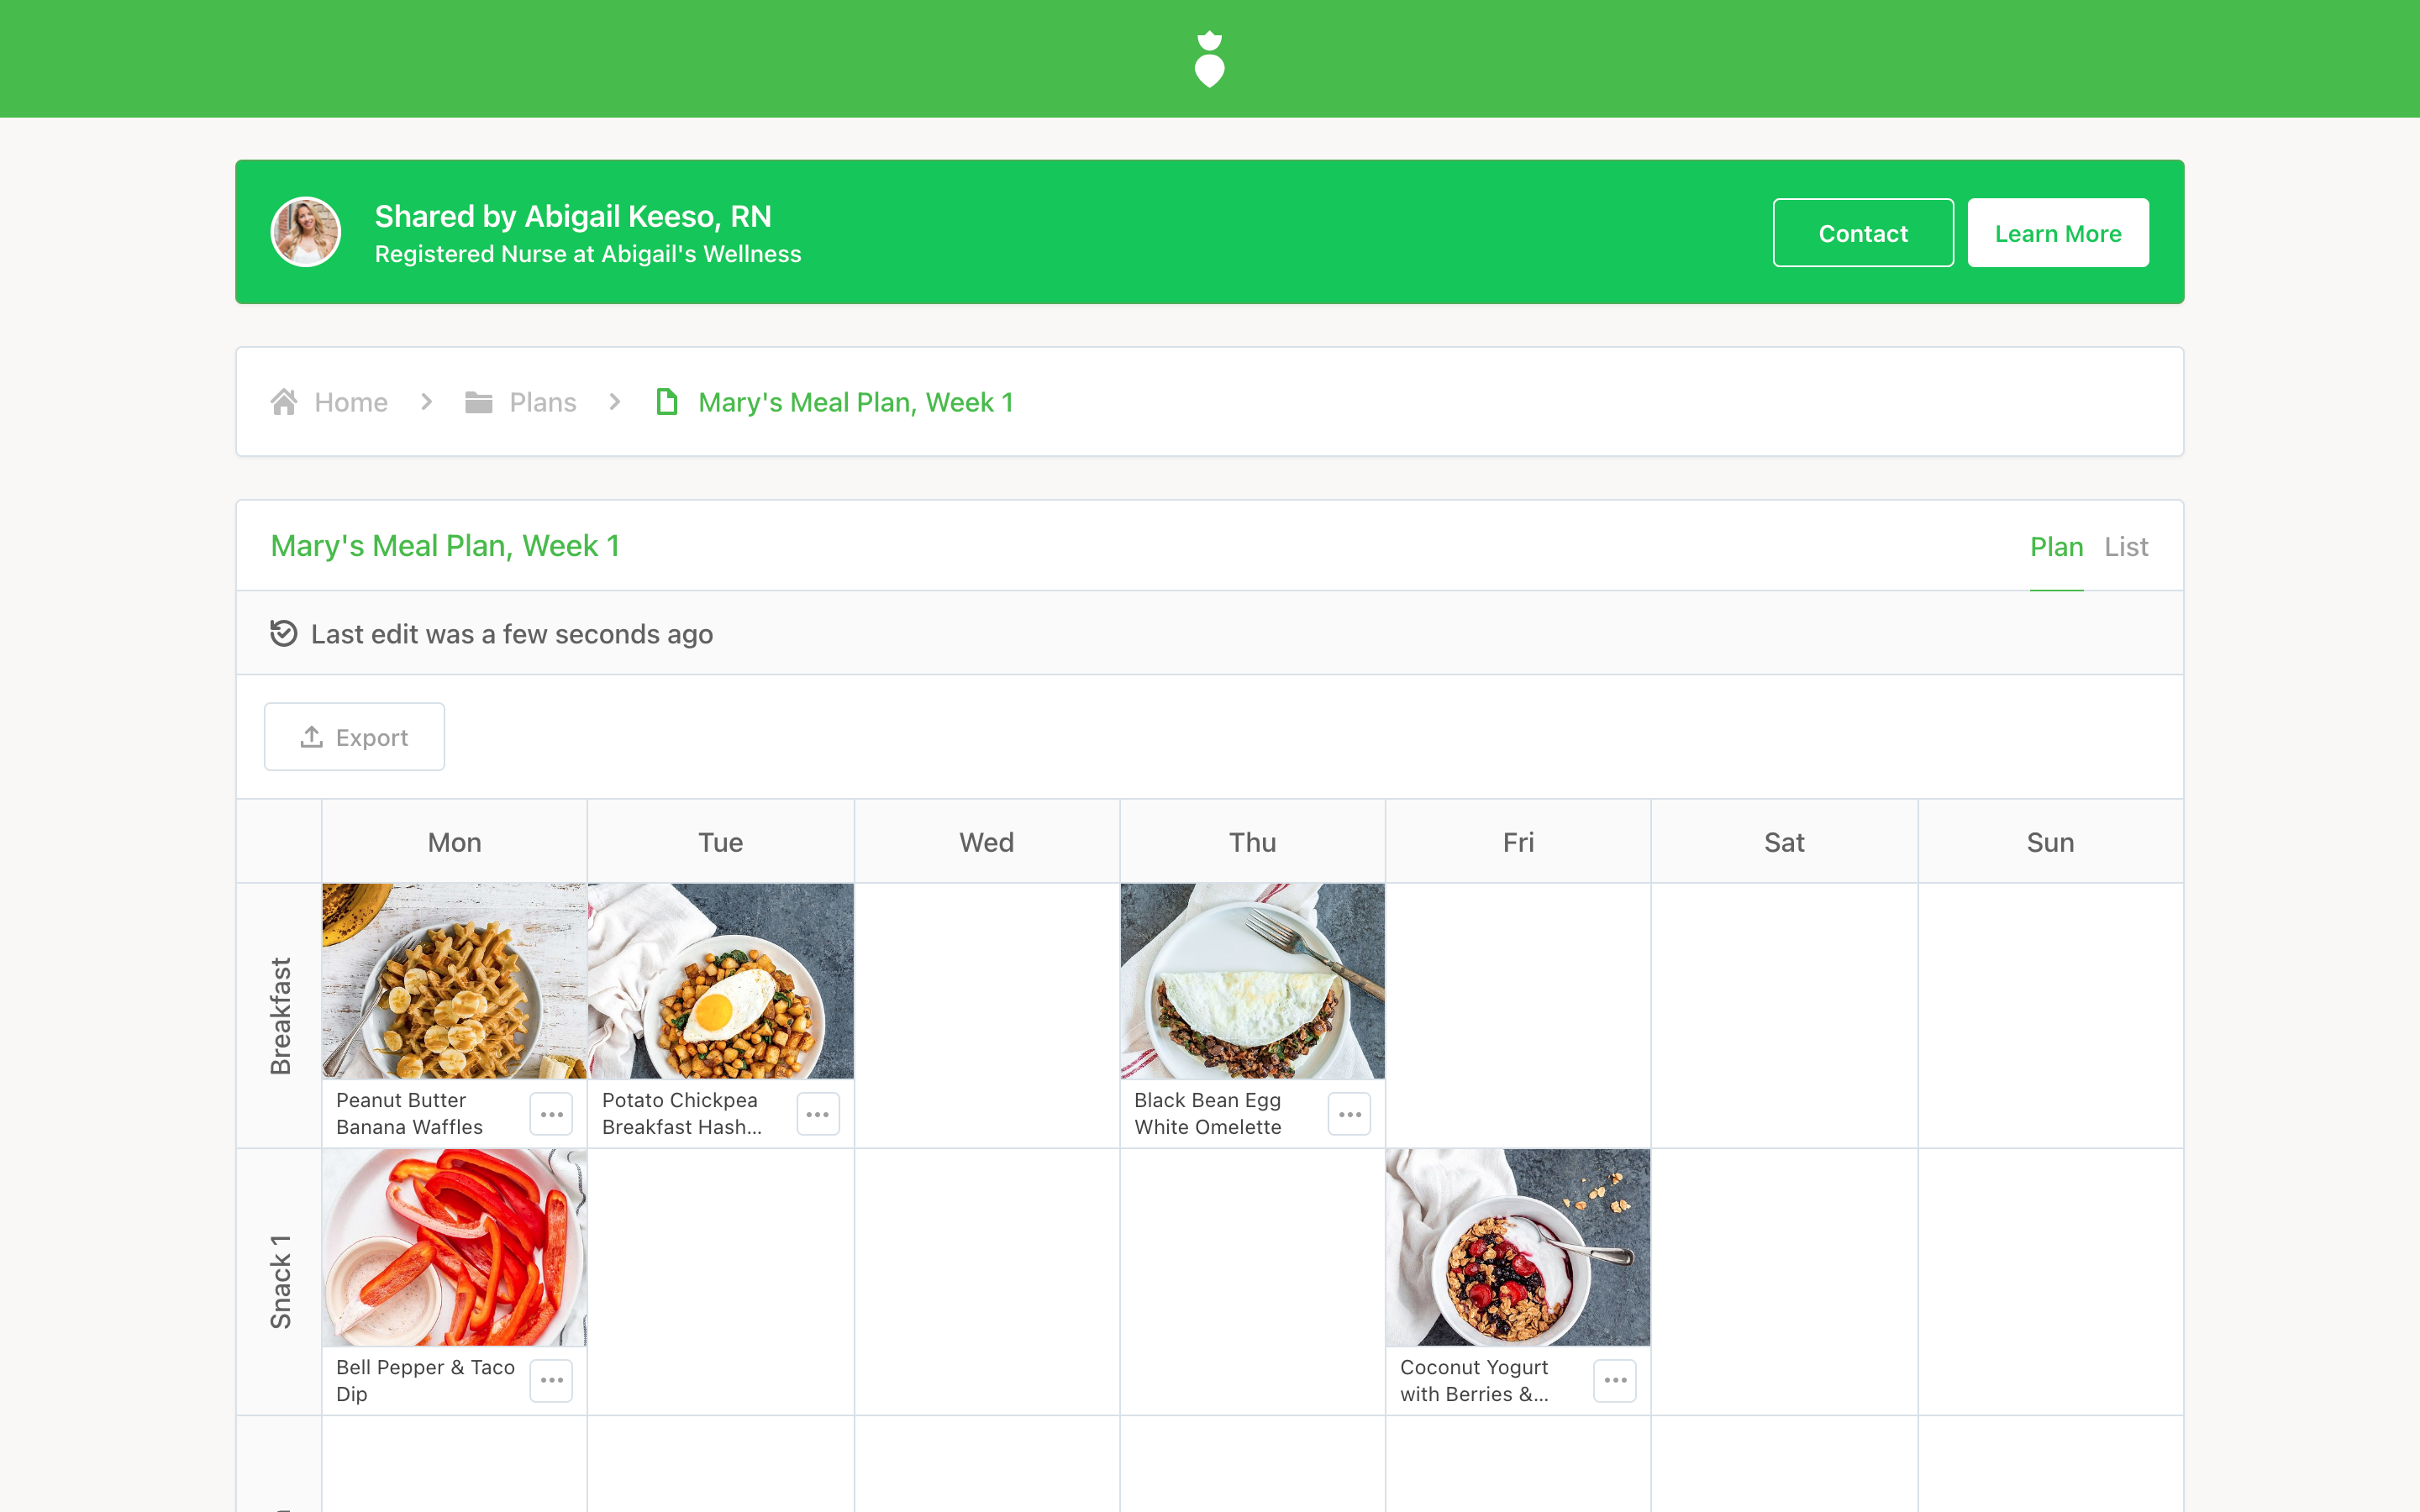
Step 1: Access your personal meal planning guide using the link provided. On the left-hand side of the screen, you will see your planner. On the right-hand side of the screen, you will see a list of the recipes I have selected for you.
Step 2: Next, look through the recipes and select meals that appeal to you. Add them to your plan by clicking the "Add" button. Set the number of servings you'd like the recipe to create. Continue to add meals to your plan until it is complete to your liking.
Step 3: As you add meals to your plan, you'll notice that your grocery list is automatically generated. You can view it by clicking on the "List" tab from your Planner. Your list is organized by category so that you know exactly what you need in each section of the grocery store. When your plan is done, get the list and do your shopping.
Step 4: Once you have done your shopping, you may want to do some meal prep. This is optional but can really help set you up for a successful week. Look at the recipes you have chosen and see what can be prepped in advance. Perhaps you can dice vegetables or even make an entire recipe to save yourself time later on in the week.
Now that you've created your plan, shopped, and done some meal prep, you are all set to follow your meal plan for the week. Check your plan every morning and night, so you know what is coming up next and can stay organized.
Meal planning is a skill that gets easier over time. Reach out to me any time with your meal planning questions.
If you're working with the client over a long period of time, you can keep adding blank plans and new recipes to their collection to keep them inspired and engaged. As their practitioner, you'll be able to see what your clients add to their plans and provide them with feedback.
With an awesome meal planning guide and clear instructions on how to use it, your client will feel empowered to do their own meal planning – and you'll get back so much more time.
